ADDING A DOCUMENT TO A TRANSACTION
In this tutorial, you will learn how to upload a document and share it with other transaction participants.
On the homepage, select a transaction:

Once in a transaction, click on the "Documents" tab:

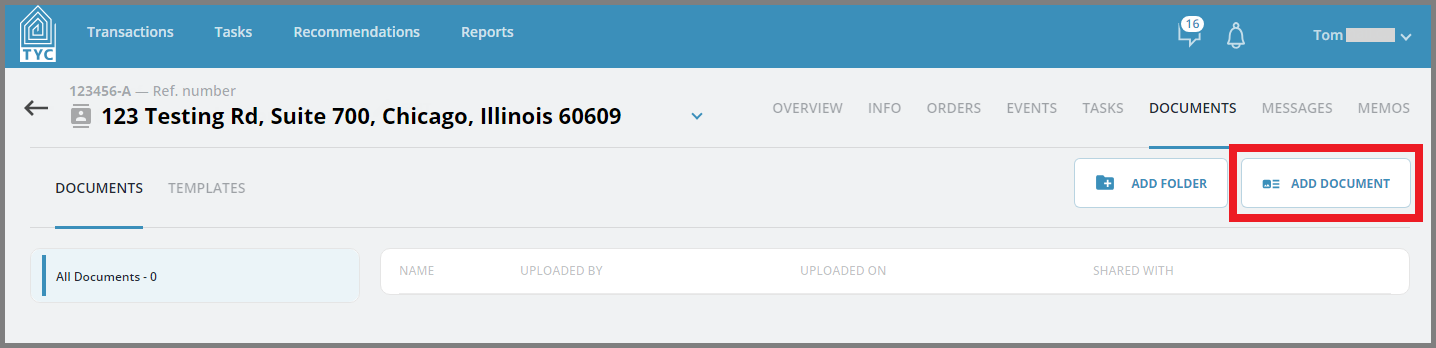
Now on the Documents tab, click the "Add Document" button:
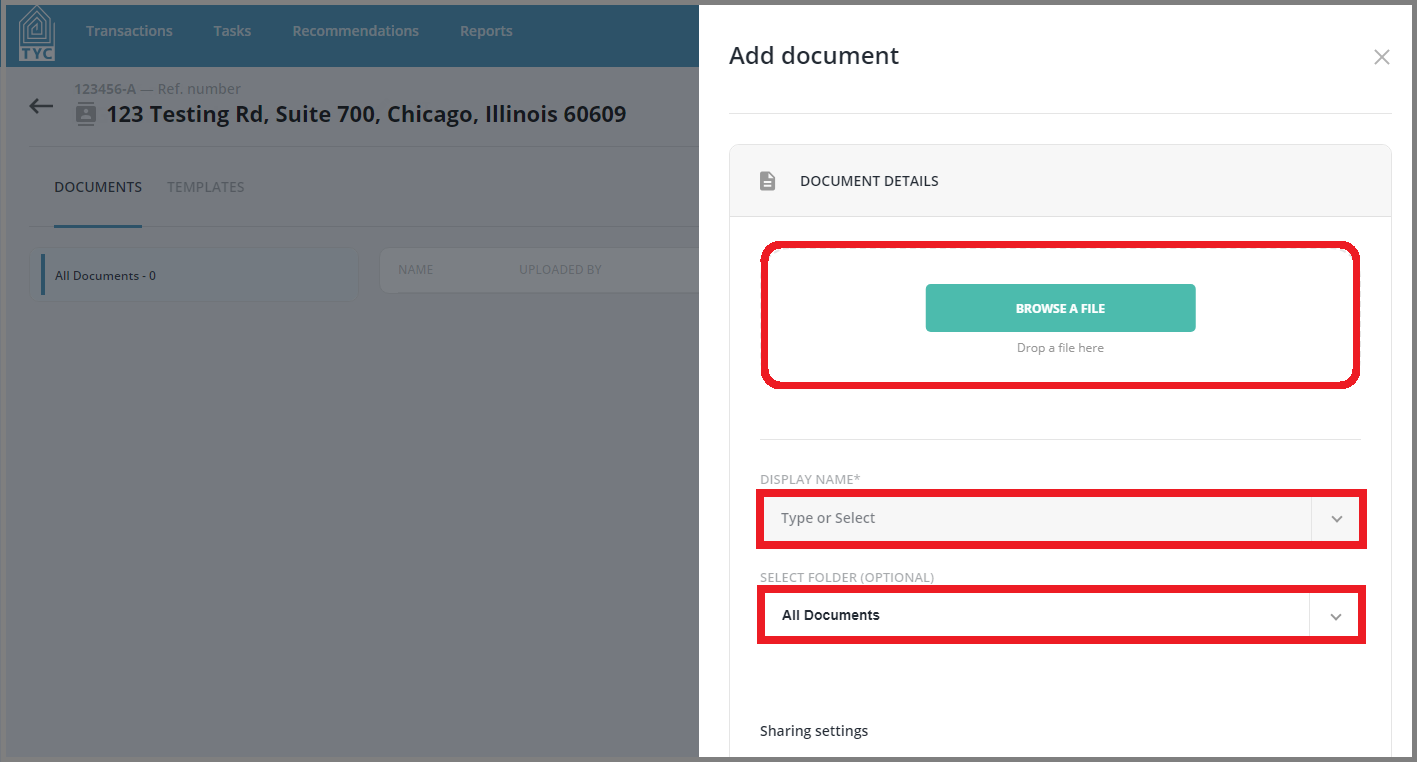
You can either browse your computer for a file or drag it into the designated area.
The "Display Name" will be auto-populated with the document's name- from there, you can select a Common Document Name from the drop-down (if any have been set up for your company) or you can further modify the name of the document manually as needed.
You can select an existing folder in which to add it to, but this is optional:
Lastly, you can keep the document as privately shared within your company (leave the sharing drop-down as blank) or you can select participant(s) in the drop-down to share your document with securely. Finally, click the "Add" button to complete document upload:


0 Comments